Turning an old MacBook Air into a Chromebook
All that said, this machine is in really good shape. Considering it travelled with me all over the world, it barely has any marks or scratches on the exterior. When I bought it I splurged for the Intel Core i7 processor, so there's plenty of oomph left in the processor for lightweight tasks and even some more intense uses. I also splurged for the 500 GB SSD, which makes the machine a bit of a rarer specimen. Even the battery still holds a decent charge. Based on what I'm seeing on eBay I think it could fetch upwards of $400 if I were to sell it.
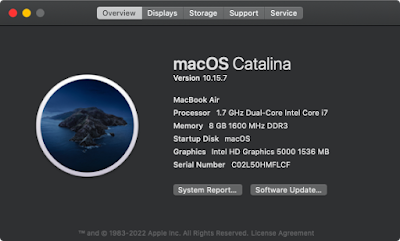 |
| Still a relatively decent spec, even by modern standards. |
A couple of weeks ago I came across this Gizmodo article. Google is has made available an early-access release of their new Chrome OS Flex – successor to what was previously known as CloudReady – which essentially turns your laptop into a Chromebook. It's aimed at breathing new life into older hardware. Google claims anything from 2010 or newer should have no problems running OS Flex. This sounded like a great second life for my ageing MacBook Air!
Doing a little research, indeed it turns out my generation of the Air is planned for certification (as is the earlier 5,1 model). As Google is still working out the kinks in preparation for full release sometime in Q2 of 2022, the device list notes that I should currently expect minor issues for my model. Given that I could always revert back to macOS at any time, I thought it might be fun to plunge in and see if I could find a use for a MacBook Air-turned-Chromebook.
 |
| My MacBook is supported, but Chrome warns me to expect minor issues. |
Installation
Let me get this out of the way. Installation is FAST. I've never seen an operating system install this quick. In fact, I was so surprised at just how quickly I was up and running, I reformatted the MacBook so I could run through the installation again and time just how quick it was.
There are two steps involved in the setup. The first of which is to prepare a bootable USB installer. Google has you install a Chrome extension that walks you through the process. It's as easy as you would expect: you plug in a USB stick, and after a couple of initial questions, the installer takes over and downloads Flex OS, copies it to the USB stick, and finally verifies that everything went smoothly. Total time to do this was 5 minutes and 28 seconds. Granted, I did this on a brand new M1 Pro MacBook Pro so your mileage may vary. But I assume this to be generally what you should expect.
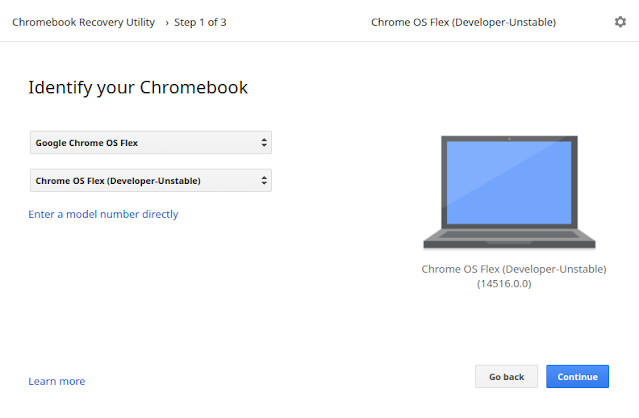 |
| A Chrome extension walks you through creating the USB installer. |
The second step is the installation itself. You start by plugging the newly made USB stick into the device you want to install OS Flex on and power it on. After booting up, you can choose to install the OS on the device's SSD, or you can try it out by running it directly off the USB stick. I chose the first option as I had no need to preserve macOS on the machine, but this might be a good option for you if you just want to see what it's all about before you fully commit. You can also choose to change the installer language. The installer defaults to US English and a US keyboard layout, but as you would expect you are free to change this to one of many many languages Google supports. I changed my language to Canadian English, but left the keyboard layout untouched.
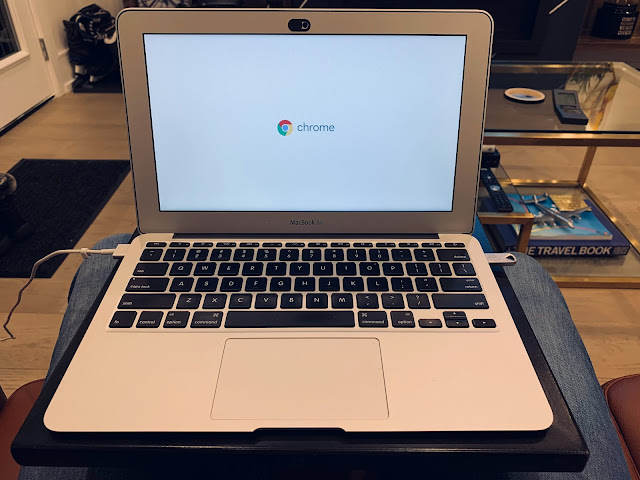 |
| Chrome OS Flex installer booting from USB |
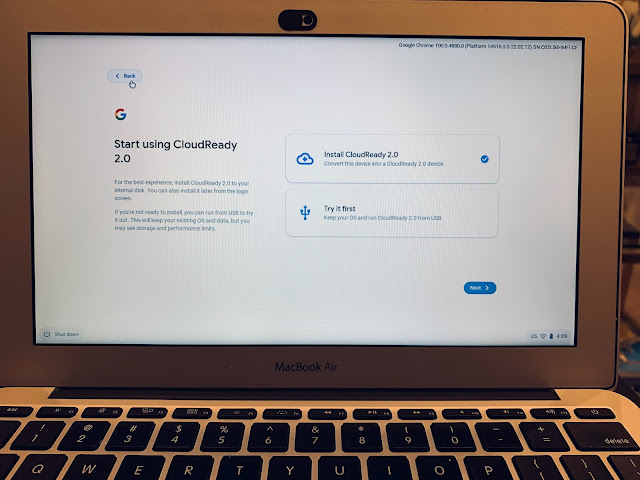 |
| You can choose a full install or you can run it directly from the USB stick in case you have commitment issues. |
...and that's it. That's all the installer needs to put OS Flex on your machine. You get a neat animation as the OS is installed. Curiously, during this time you can pause the installation if you want. I'm not really sure why you might want to do that, but rest assured, if you want to, you can. After Flex OS was written to my laptop's SSD, my machine rebooted once. There were two more steps before my machine was ready to use: first, I needed to configure my WiFi connection, and second I needed to sign in with my Google account. There is a third step where the installer checks for updates, but if you've just prepared the USB stick prior to installation, you should already be on the latest version of the OS. Indeed, this was my experience, and the install just paused only for a very brief moment as it checked for a system update.
At this point my machine was ready to use. Before I reveal how long this process took, I'd like you to think back to all of the times you had the... pleasure... of sitting through an OS install. Think about the one that went the smoothest. Not a single hiccup. Everything went exactly as it was supposed to. How long would you estimate that took? 45 minutes? 30 minutes? Personally I can remember reformatting a modern Intel MacBook Pro (2019 model, if I recall) and that took roughly 25 minutes. Pretty darn good as far as OS installs go.
But OS Flex? I was not prepared for this. From the moment I chose the full install to the moment my machine was ready to use: 4 minutes 15 seconds.
Let me repeat that: 4. Minutes. 15. Seconds.
This, on a 9-year-old laptop.
To recap, it took 5 and a half minutes to prepare the USB stick. Then it took a little over 4 minutes to actually install the OS. Add in another 30 seconds or so for the very first boot off of the USB stick prior to the install, you're looking at just over ten minutes to go from your old OS to a fresh install of Chrome OS Flex.
First Impressions
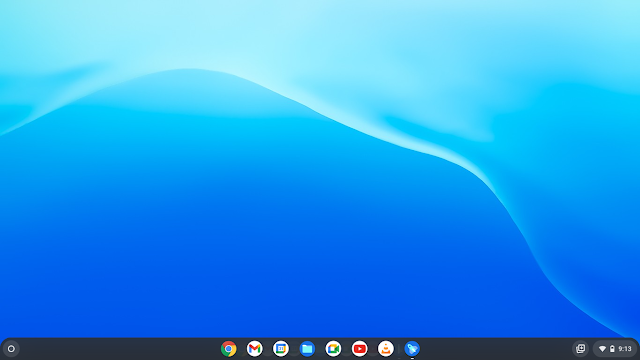 |
| Chrome OS Flex desktop |
I'd never used a Chromebook before, so I didn't know what to expect. The OS Flex makes use of a bar at the bottom of the screen it calls the "Shelf" which is very similar to macOS's dock in that your most used apps can be pinned there, but it's also quite a bit like Windows where you have various status items in the bottom right such as the current time, battery level, WiFi connection strength and keyboard layout. At the far-left of the Shelf is the "Launcher," which reveals a control to search for whatever it is you need – an app, some setting, a web site, etc. This overlay can be expanded to show all of your installed apps if you'd like to find an app by browsing. To me the Launcher appears to be more like how the Start button works in Windows 10 or 11. Open it and just start typing to find what you need, or click to browse all of your installed apps. Generally, both Mac and Windows users should have no trouble adjusting to how the Shelf works.
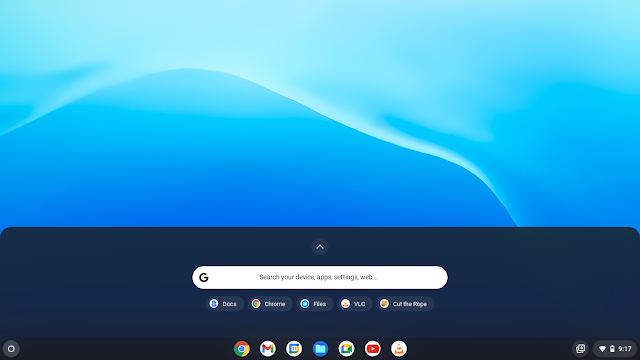 |
| Launcher, stage 1: Just type what you're looking for |
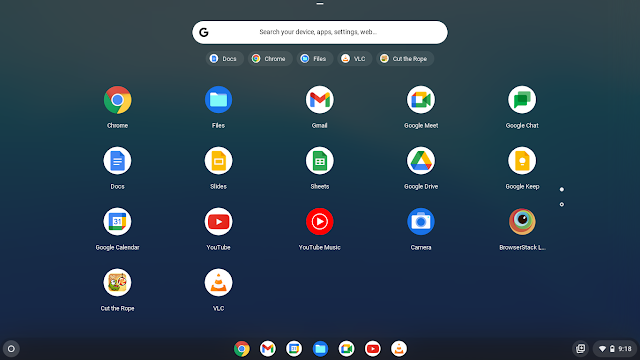 |
| Launcher stage 2: Expand to browse all your apps. |
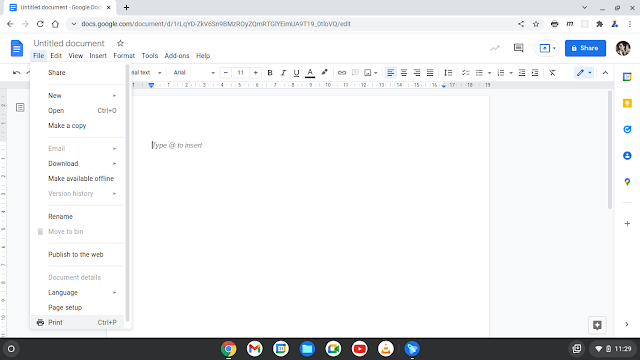
The one thing that is VERY different, though, is that there is no menu bar at the top of the screen, nor does one appear when you open an app. On the one hand, the experience is much like using apps on a tablet device. On the other, you might get lost a little when you want to do things like save or print a document. Chrome OS is meant to be cloud-based, as such your documents are managed through Google's suite of apps which auto-save everything as you work. From that perspective, there is no need for the old-fashioned File -> Save routine. However, if you want to print something, say a web page, you're forced to rely on using a keyboard shortcut (CTRL-P) to bring up Chrome's print dialogue. Google Docs and Google Sheets both have their own top menu built in to the apps as they run in your browser, and the print function can be found under the traditional File menu. The lack of consistency is a little frustrating here, but by no means a deal-breaker.
 |
| No menu bar here... how do you print? |
 |
| Google Docs has it's own menu bar, and here you can find the print command ye olde fashioned way. |
Thankfully, quirks like the above are mitigated by OS Flex's Chromebook Simulator that shows you how everything works. If you've never used a Chromebook before I highly recommend taking the 20 minutes or so to go through all of the mini-tutorials. You'll learn how to do various common tasks including the keyboard shortcut that will allow you to print from Chrome. Having gone through the tutorial, I feel confident I can now use this machine to do all sorts of common tasks such as surfing the web, working with Google Docs and Sheets, email, messaging and all of the other things you'd want to use this machine for.
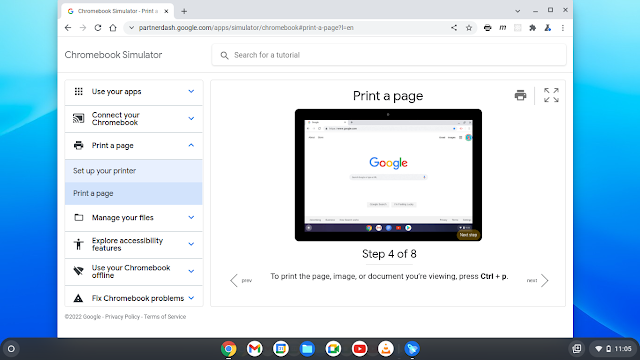 |
| The Chromebook Simulator quickly gets you up to speed with how Chrome OS works. |
Hardware-wise, it appears that my machine is well-supported. I was worried that things like the trackpad wouldn't work as nicely under Google's OS as it does under macOS. I'm happy to report that the trackpad is just as buttery smooth under OS Flex as I've always loved on Apple's machines. Furthermore, there are settings that I normally need to enable on every fresh macOS install such as two-finger right click, disabling Apple's default "natural" scrolling direction (call me an old fart, but I'll never get used to that), or double-tap to enable drag lock (a REALLY useful feature that Apple inexplicably buries under its accessibility settings). All of these were enabled just the way I like out of the box on OS Flex.
Quirks
As Google warns in the docs prior to install, there are a few things that don't work right. All of these are minor and defects such as these are to be expected given that this is a pre-release of OS Flex. Just to name a few, the welcome tutorial shows you how to use the trackpad. One of OS Flex's features is a three-finger vertical swipe to reveal all open windows. This just didn't work, along with a number of other three-finger gestures. However three-finger clicks to close browser tabs DOES work, so it just looks like there is a bit of work for Google to do here to get it all working.
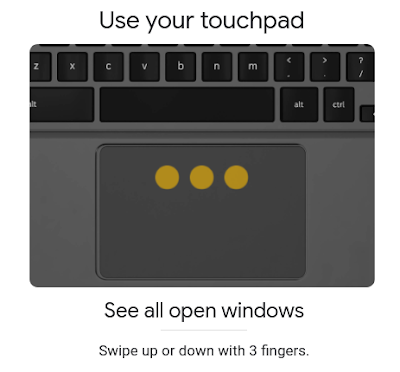 |
| Most three-finger gestures don't work yet... |
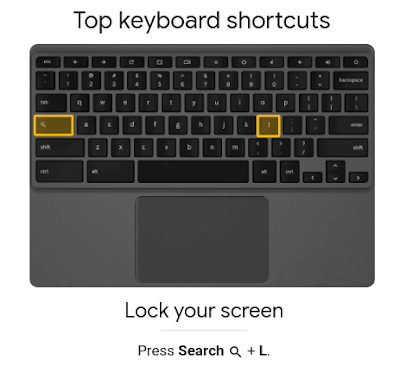
While the docs are great at teaching you how your new OS works, they are written for a true Chromebook, and as such do not account for the physical differences of your machine. For example, a true Chromebook has a Search button in place of where you would normally find the cap locks key on a standard keyboard. Many of Chrome OS's shortcuts make use of this search key and as such won't work on a MacBook or a Windows laptop running OS Flex.
 |
Also not supported is the ability to run Android apps, nor could I enable Google's voice assistant. I'm not sure if these two are limitations that Flex OS will never support or if they will eventually be enabled in a future release.
Lastly there are a few minor bugs that have popped up so far. For example, when exploring the various settings, it turned out that my time format was set to use the 24-hour clock, but the time displayed in the bottom right corner was in the traditional 12-hour format. Toggling this setting off and back on fixed that display problem and I was able to switch between the two formats correctly from then on. Another thing I found when looking for a way to remove the keyboard layout from the status was that even though I never configured it as such, a second keyboard layout – English UK – was installed. I'm not sure if this is a bug, or if it is a by-product of my changing the default language to Canadian English. In either case, it was a simple task to just remove it, which also removed the display from the status.
All of these, of course, are minor things. OS Flex thus far has been remarkably stable on my MacBook, and none of the above oddities would get in the way of day-to-day usage. Battery life, too, seems to be more or less what I had before under macOS. I haven't yet put it through any real effort, but given that I haven't found a way to manage sleep mode to my liking, I haven't seen any unusual battery drain occur.
Conclusions
So far, this experiment is off to a fantastic start. I'm going to keep OS Flex on my MacBook for a while and use it for casual tasks, such as writing this blog post! I'll keep it handy in the living room for anything that I find too tedious to do on my phone, such as filling out forms on websites that aren't optimized for mobile (like really... it's 2022...), or for researching my next nerdy project to work on! I'll write a follow-up article in a month's time or so relating what my experience with OS Flex has been like.


Jeff, thanks for the article.
ReplyDeleteHow did you get keyboard backlighting to work on the Macbook Air under ChromeOSFlex.
This is so important if you can't see the keys at night
Hi @Etienne. To be honest, I don't even know if that worked for me or not. I have since moved on and reinstalled MacOS on the MacBook Air. I found Chrome OS to be far too limiting and disjointed from the rest of my apple-centric computing eco-system for it to be useful for my needs.
ReplyDeleteHello Jeff,
ReplyDeleteThe reason I tried ChromeOS Flex is because Apple has deemed my MacBook Air too old and I cannot install their OS any more. I can't do anything about that.
While you can't officially install the latest version of macOS on older MacBooks, you should be able to install an older version of macOS just fine. My MacBook Air is a 2013 model and I was able to install macOS Big Sur on it, which was still releasing security updates as of late 2023. Plus there are ways to get more recent versions on older officially unsupported Macs. This article, for example describes how to install Sonoma on older Macs and outlines what tradeoffs you should expect:
ReplyDeletehttps://www.intego.com/mac-security-blog/how-to-keep-older-macs-secure-a-geeky-approach/